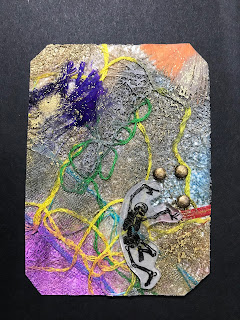
"Nesting" was created for the AtlasQuest LTC tracker "Round 1: New Product/Underused" hosted by Linden Leaf. I chose to work with Fusible Webbing (FW) for the four rounds of the tracker. For each round, I need to find a new way to use FW.
For the first round, even though I chose a technique that I've used before, this card would offer its own challenges.
The following technique is easy and, in my opinion, creates a dramatic effect.
FusibleWebbing is available at JoAnn Fabric & Craft Store and other crafting outlets. (Zoom in to read the label.) When heat is applied, the FW fuses with fabric, lace, ribbon, paper, cardboard, wood and more. Since I haven't used this since 2014, I can say that the product doesn't go bad.
I also learned about a fusible powder that can be sprinkled over the materials: Bo-Nash Bonding Agent
For the first round of the LTC tracker, I created a nesting mix by cutting up leftover pieces of ribbon, yarn, string, fake leaves...anything I could find!

The FW has a disposable paper backing that is removed. I cut small squares and added them to the nesting mix so they would fuse all the nesting bits together on the card.
After placing parchment paper under the card, I clustered the nesting material onto the card over the FW. I wasn't worried about overhang because I would trim that off later.
Then I sandwiched the card between parchment. Meanwhile, I've been heating up my craft iron on the cotton setting (steam is recommended but it works without it too,)
I pressed the card (making sure to protect my work surface too.) The heat melts the FW creating a sticky bond within the nesting and between the nesting and the card.
It is a good idea to let the card cool before pulling the parchment off so the FW sets (and avoid burning your fingers on hot melted plastic.) I added additional bits of FW where needed to secure the nesting or added more nesting and then reapplied heat.
The stamped image was simply colored in Copic marker and after fussy cutting it, adhered to the card with an adhesive foam square. I embossed the background with the Richard Garay pine needle folder and a Big Shot machine. I couldn't decide between the bird perching on the nest or nestled within. Happy with both.
Below are two more cards using the same technique:
April Fool's Leftover Quickie Swap:
Juggler of the Cosmos, March 2014.
Fiber Art:
Serenity at Sunset, June 2014


No comments:
Post a Comment