 For the I Got a Jar of Dirt tracker, I wanted to make a translucent jar and have it filled with frogs. I want the jar to seem translucent and dimensional with the frogs seemingly on the inside. I decided to emboss the jar to create ridges that would hold the Dimensional Magic (gloss) within.
 In order to have a clear jar, I needed to work with clear plastic and this would require heat resistant acetate.
  Typically working with plastic, a crafter might use a solvent/alcohol ink such as StazOn. Since I would be heat embossing the ink, I could use pigment ink to stamp without it smudging off.
  Embossing supplies:
 * powder
* paint brush for removing unwanted powder
*chalk powder bag to prep the surface.
I keep a plastic tub of embossing powder. Holding a card with tweezers, I dip cards into the powder and shake or tap off. Now and then, I have to pull some cat hairs out of the powder.

One of my favorite tools is the reverse tweezers-- a must-have for crafting. I think it was GreenMountainHiker who turned me on to these nifty crafty gadgets.
 Once stamped and dipped in the embossing powder, it’s easy to see why the anti-static bag and paint brushes help.
Not wanting to clean up that mess of unwanted powders on the stamped acetate, I cleaned both sides of the acetate with alcohol to remove any oils. Then I pounced the anti-static bag on both sides of the acetate.
*Make your own anti-static bag with cornstarch or baby powder, or purchase at craft store.

Big difference! The cleaned, anti-static powdered acetate resists unwanted embossing powder. The extra marks within the jar can be swept away with a paint brush or q-tip.

During the heat setting, I use a wood block as a protective surface so I can rest the card on it and protect my work surface (self-healing cutting board) from heat damage.

Applying the heat with a craft heat gun. The acetate will resist the heat BUT too much will definitely warp, even melt it.

Wha-la! The embossed jar. Excess anti-static powder wipes off with a cloth. Some minor warping on this one due to too much heat.

Next, using Mod Podge Dimensional Magic (MPDM,) I applied enough to cover the image and used a small tip brush to distribute the gloss evenly and remove/pop any air bubbles.
FYI: do NOT shake MPDM as it adds air bubbles to the liquid.

With the surface still wet, I layered hole-punched gum balls. A few of the acetate pieces were slightly warped so I taped them down so the MPDM would settle evenly within the embossed borders. In this pict, I'm using another favorite tool-- the Marvy Jewel Picker. Easily picks up tiny items.
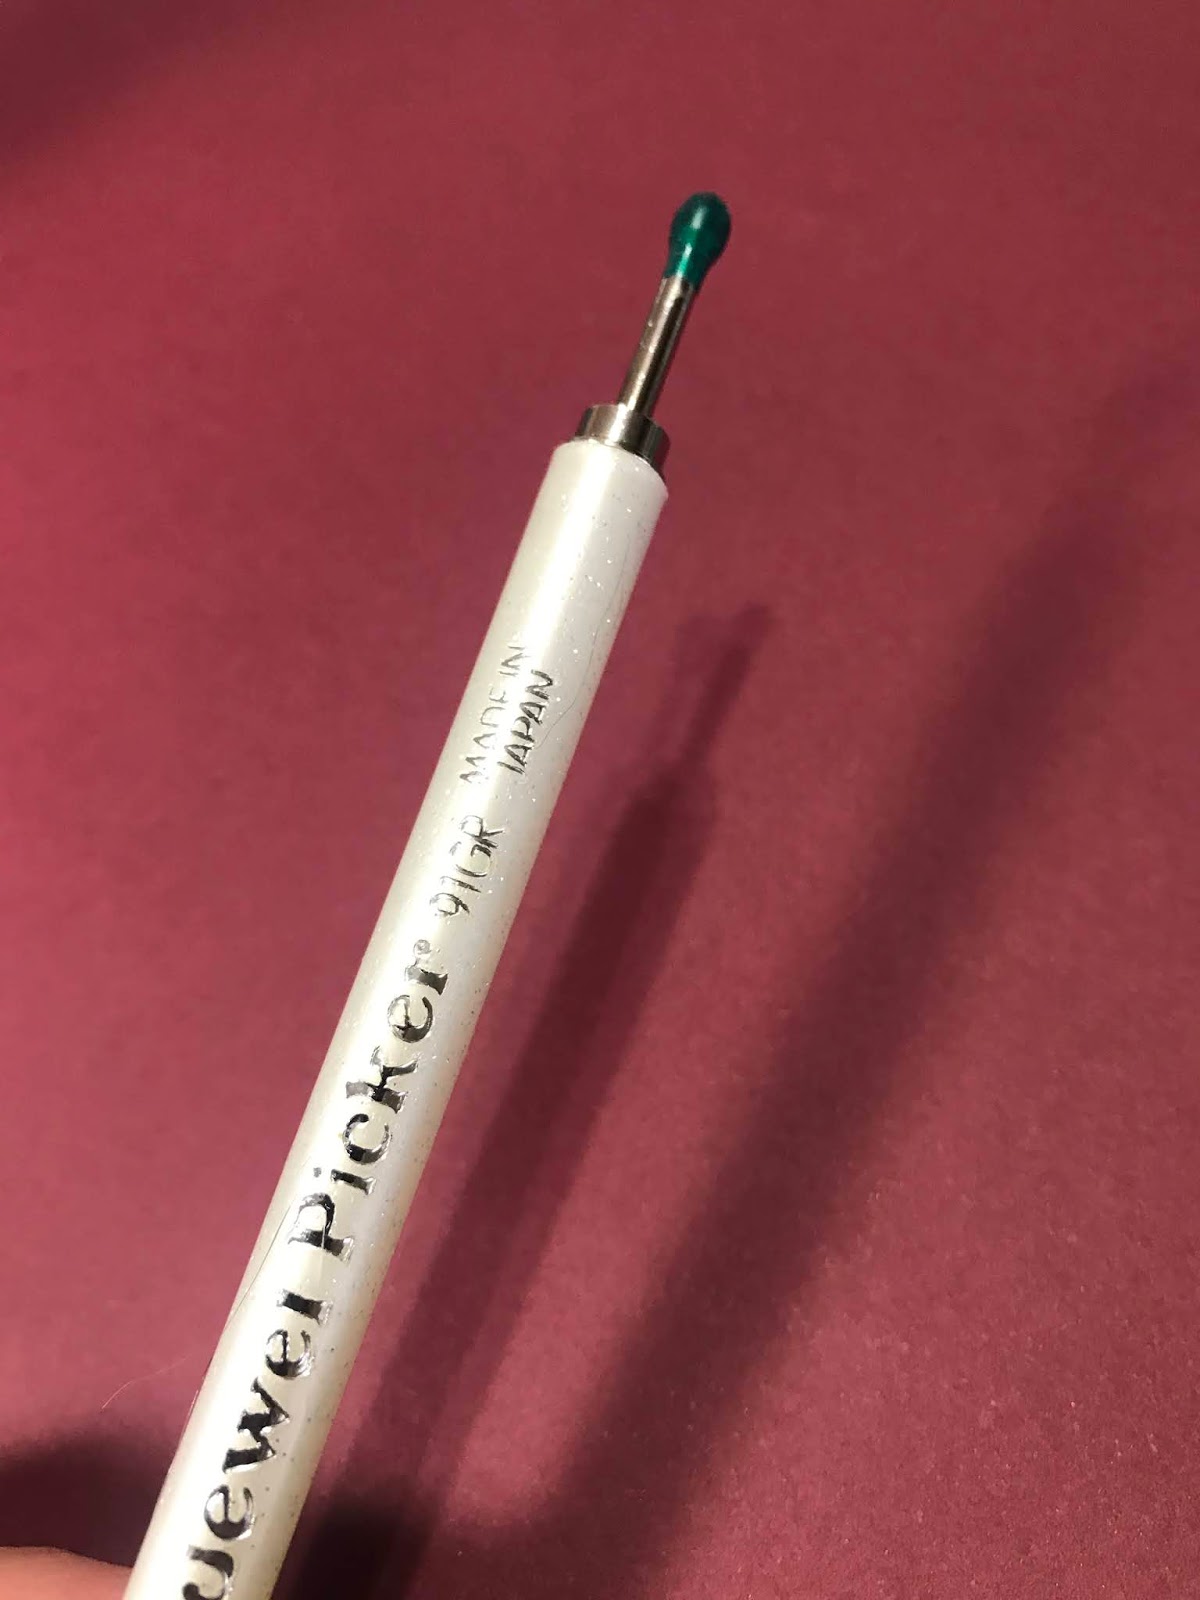
Close up of the Jewel Picker. Sticky (green) tip. Anyone who does Diamond Art will something like this. Some use a resin-like substance on the tip to create the adhesion. I like this because it is oil-free and can be cleaned.

Ready for the next layer of MPDM.

I carefully added more MPDM to fill in and cover the gum balls.

I decided to work this layer right up to and pass the embossed edge so the finished jar might look smoother or more rounded on the edges. I would simply trim the excess.

Find a safe place away from the cat’s mischief to let dry. MPDM will dry clear. I added more MPDM where needed to create a smooth surface of glass. Lastly, I cut each out while watching The Joker. Great movie, by the way!
A final jar, which probably could use another layer of MPDM.

This is my quisp for the tracker. Jars of frogs' toes. Perfect for a witch’s kitchen. Actual size is about 1” x 1/2”. Frogs were punched out.
What would I have done differently?
- I think I would have liked bubbles in the gloss. Might have given it more of a liquid look.
- Maybe a smaller tag but I had that punch so that is what I used. I laugh when people say I'm a perfectionist. Ha!
- Maybe added a touch of color--yellow or greenish-- to the liquid to make it look like it's been sitting for awhile. In the example above, the MPDM seems to have pulled some color from the card stock used for the frogs.
- I wonder what it would have looked like if I would have layered a few more frogs. Really make them look squashed in there, but I also wanted to maintain the frogs' outlines. I thought about applying a couple frogs followed by gloss, a couple more and more gloss. Didn't want to mess with the timing of all that.