
Resources needed:
- card stock or other porous surface to work on
- molding paste
- textures: no need to buy anything. Use lids, crinkled paper or plastic, cut zig zags or curves into cardboard edges, bubble wrap, etc.
- tool to apply paste-- plastic knife/spoon, popsicle stick, putting knife
- acrylic paint assortment
- brushes, stencil brushes, sponges, etc.
- optional: small do dads: beads, pieces of ribbon, wire, chip cardboard pices, cardstock cutouts, puzzle pieces, scraps of pink,
Textures wrapped and secured around wood blocks. Something new I'm trying.

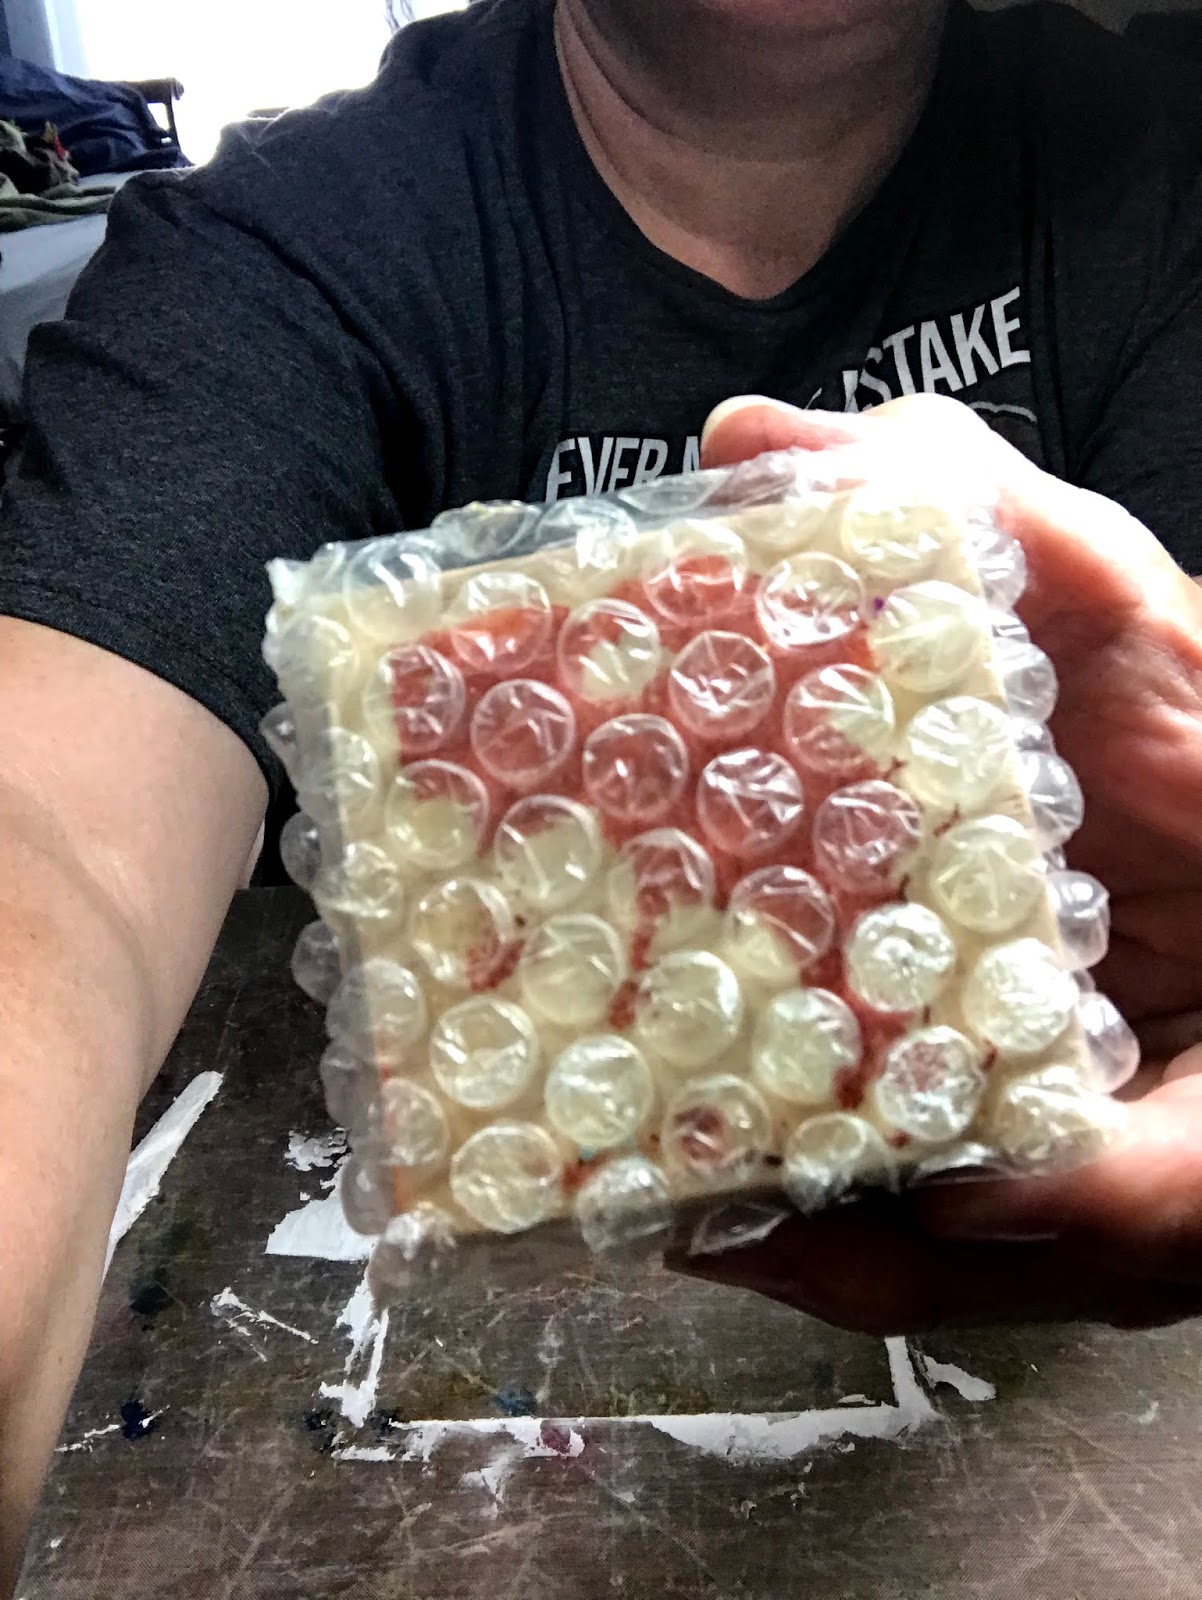

Embossing folders create dimensions/textures as well. Also going to press small beads into the molding paste.

Liquitex molding paste. Matte finish.


Glopping the paste on the card stock. I use a pice of card stock that when cut would make 3 or 4 trading cards. Size will affect available working time while paste is drying.

Once applied, the surface doesn't have to be smooth but needs to be relatively evenly applied so I used a ruler. Overall about 1/16 to 1/8 inch works well for impression depth.

IMPORTANT: Before stamping, the paste needs to set-up for a few minutes. If touched, the paste should not stick to your finger-- too wet. A craft heat gun can expedite the set-up process. If it is too dry, the paste will not take the impressions.


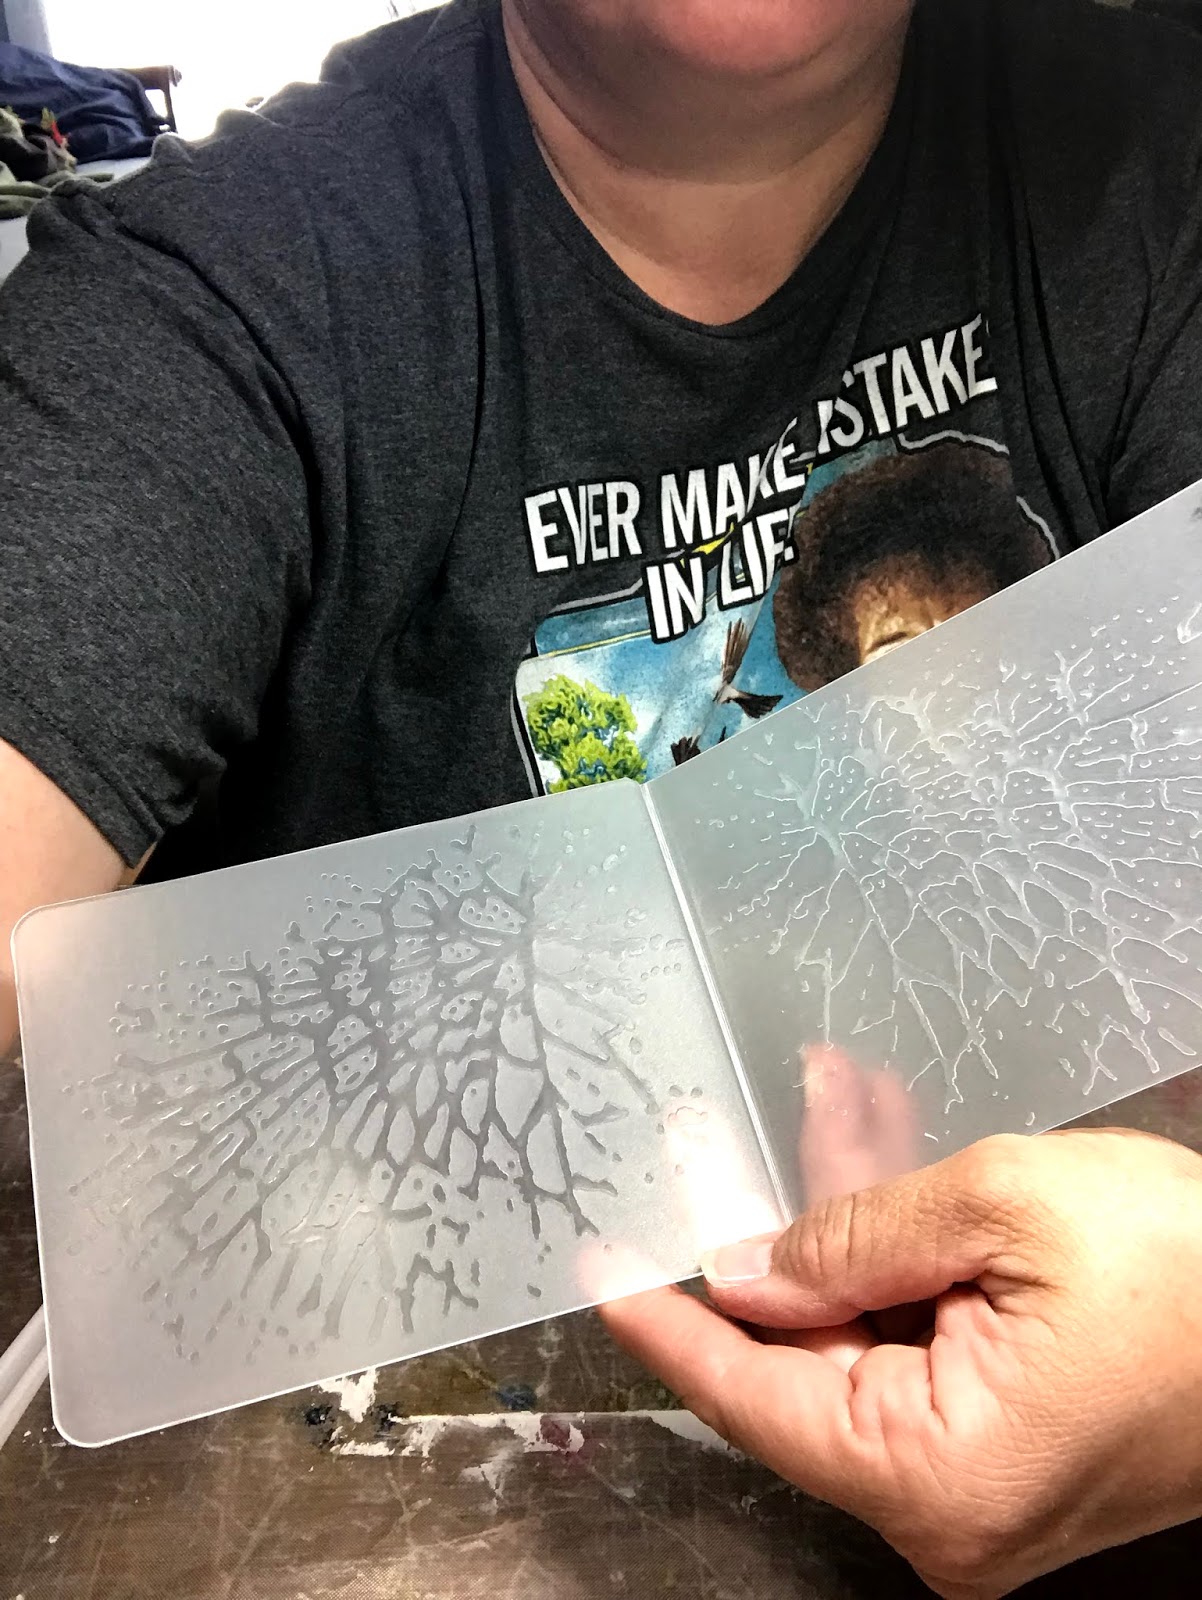
The impression on the left is perfect. The right side was still too wet
and the paste stuck to the folder, but still makes a cool effect.

I love the screen texture.


I used the flat side of the embossing folder to press beads into the paste.
If they do not stick, spritz the surface lightly with water to moisten the paste and press again.


Find a safe place (away from kitty cats) for the paste to dry.


Easier to measure & cut from the back side.

Determine which direction for best layout, and add additional color where needed on each card.
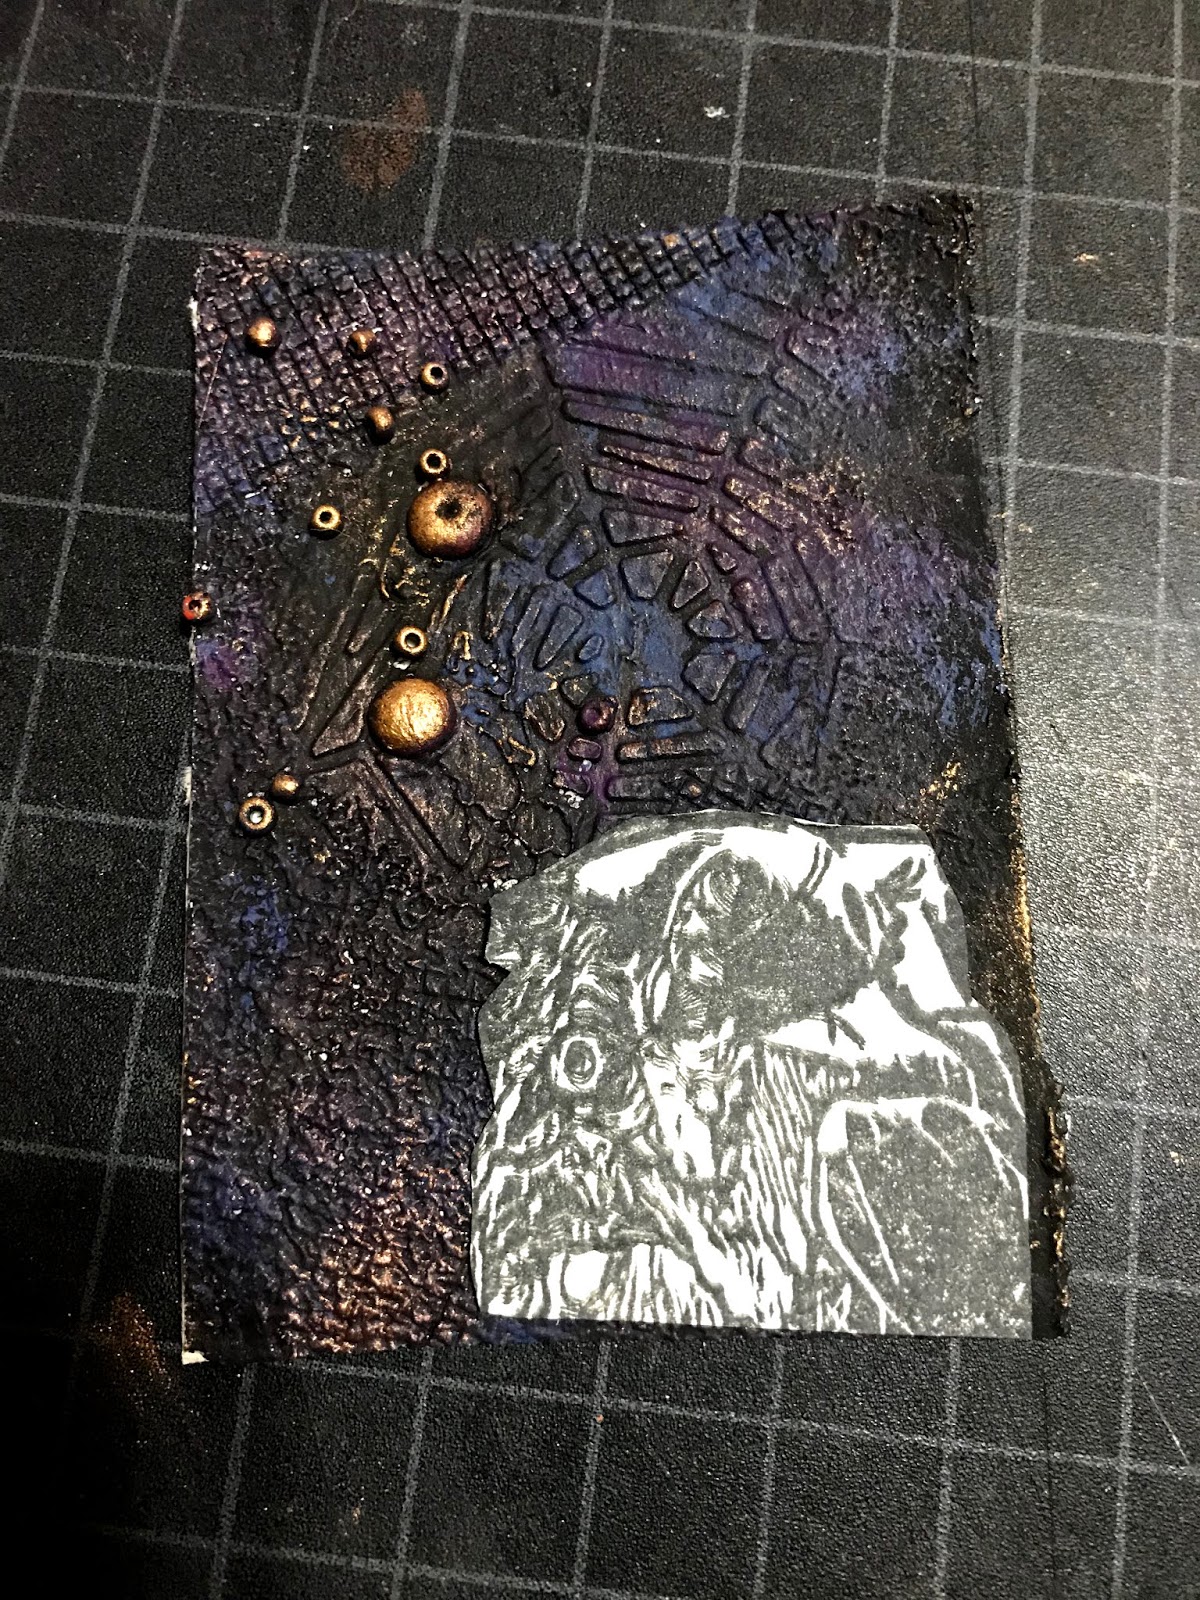
Lots of coloring and fussy cutting ahead to prepare the main image (witch.)

Distress the edges of both the witch cutout and the card with black ink, and adhered the witch with an adhesive foam square. A white edge of an unfinished piece poking its head out takes away from the overall appeal.
No comments:
Post a Comment